Showing posts with label aimtocreate. Show all posts

Saturday, November 29, 2014

Nailhur - Reusable Manicures!


Happy Holidays ! I know I have been MIA again for a bit, but things have just been so busy lately that I haven't had any time to do videos or blog posts.
My posts usually come when I find items or products that I truly love  and this product I'm writing about today is truly a gem !

 
 I've been wearing artificial nails for a few years now, both from the salon and ones I apply myself. Most of the brands that I've tried are only good for one wear which is typically around 5-7 days in duration . Well what if you could have nails that you could reapply whenever you want?
Enter Nailhur! Yes, these babies are reusable. This was something that I personally have never run across in my search for the perfect nails.
Nailhur sets come with 24 nails in 12 different sizes that are all numbered to match up for a quick and easy application. I literally applied these nails in less than 10 minutes!
Here are just some of the pros:
  • Each nail is numbered
  • The thickness of the nail is perfect, not too chunky and not too thin
  • The shape of the nail hugs your own nail perfectly
  • No chipping
  • They come in square, oval, and stiletto shape
  • You can file them to your preferred length
  • Very durable
  • Each set comes with nail glue that is strong and HQ free, as well as a file
One of the main things that I love, is that they stay on very securely and for a good length of time. I tested these out thoroughly by doing heavy cleaning and dish washing and I even took a bath and they were still in tact. I think most people think that artificial nails just pop off randomly and that they aren't very durable, however that's not the case with Nailhur nails. I would say the trick is in the amount of glue that you use, because too little will of course cause them to come off easier, but a good amount allows the nail to feel secure and really just like your own nails.
Here is a picture of the nails after a week and a half of wear. I'm wearing the set "Spellbound"


With the set having various sizes, it is a win win to have a perfect fit no matter what shape your nail bed might be.
After all of the activity I was doing I can honestly say that only a few of the nails needed reapplying, which in my experience is pretty darn amazing. Another thing that I would experience with the other brands of nails would be them possibly splitting down the middle or chipping/tearing on the sides. These nails held up like champs! Not only were there no chips, but absolutely no tearing or splitting.
 
Another thing I noticed was the condition of my own nails when one would come off. Typically my nails would be left with a ton of dried glue on them and they would feel very weak and thin.
This was not the case with these nails. In fact I noticed my own nails continued to grow and felt strong and healthy. Removal was very easy with just simply soaking them in some warm water before gently prying them off.
 
Again, the greatest thing about them is that after removing them I can say without a doubt that these can be reapplied for another wear if not more.
They do have various shapes to choose from, and a TON of different designs. With accent nails being all the rage now, they are definitely on that trend with some sets that have multiple accent nails to sport.
 
So my vote is in 100% for Nailhur. It would be very hard to go back to another brand after this.
Here are two more styles that I bought and am super excited to wear.
 
 "Uber Chic"
A square shape set that has adorable black & white polka dots.

 
"Lucky Eye"
This set has the oval shape and is perfect if you want a bling bling look for a night on the town or just because. The black nails and printed nails are a matte finish, which looks absolutely flawless. The accent nails have sparkling rhinestones that will be sure to catch and eye or two :)


I highly recommend these not only for first time users of artificial nails, but also for the pros out there. For all of the money and time you spend at the nail salon, you could be out having fun showing these off.

 
Check out Nailhur's website HERE and take advantage of this limited time offer to get 40% off your order by entering the code NAILHUR40. They ship worldwide!


Monday, November 18, 2013

DIY- Embellished Gloves- Perfect Christmas gift idea!!

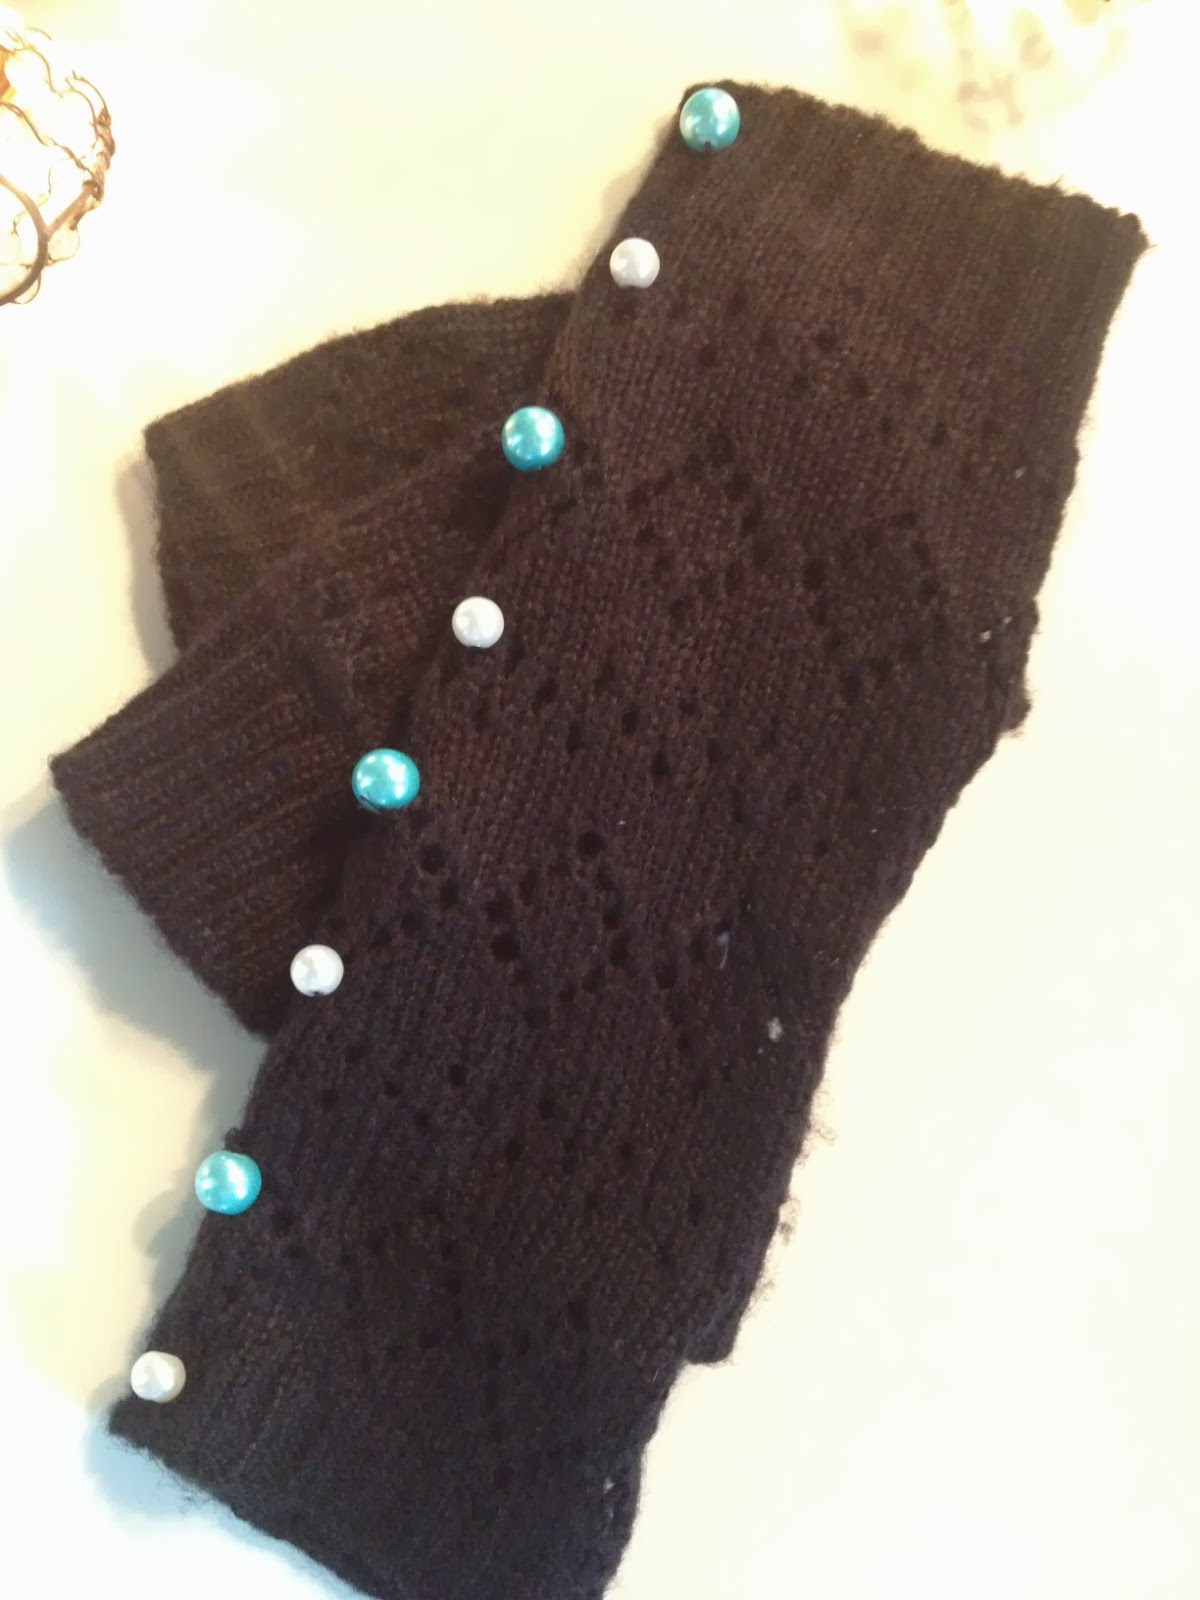
During a trip to Forever 21 over the weekend, their finger less gloves caught my eye. I noticed they had an assortment of different types but the ones I liked most were embellished with rhinestones :) What girl doesn't like a little sparkle right? But then I thought, well I could make that. 


So I grabbed a pair of their non embellished ones and then stopped at Michael's for some materials. 
After getting home it occurred to me that I had a longer pair of gloves stowed away with my winter scarves. Raiding my craft box, I found some some pearls and decided I would go ahead and make a second pair for my DIY this week.
What you'll need :


Finger less or fingered gloves
Shorter pair $5.80- Forever 21
    
Needle, thread, scissors

Pearls from Michael's $1.00 a strand


Embellishments from Michael's bead section
Bead Gallery on sale 50% off- $3.00 each strand


Watch my Youtube Tutorial here


Finished product!


I think these make such perfect Christmas gifts and you can really make them unique to the person you are giving them to. Everyone loves a homemade gift:) If you try these out make sure you comment or leave a pic on my Facebook, and or hashtag me on Instagram #aimtocreate

Monday, September 23, 2013

DIY- Embellish your shoes with paint

I love revamping things from my closet and shoes are no exception! I've had these black lace heels for a while now and decided they needed to be jazzed up a bit to provoke me to wear them a more. Literally anyone can do this project, even a kid it's so easy. In fact a perfect shoe would be Keds since they are canvas and would take well to the paint.

These heels were actually quite cheap when I bought them last year at Ross, I think they were $16.99


I picked up this Tulip Puffy Paint at Wal-Mart for $0.97 each! 
Michael's has a huge assortment of colors and textures as well.

Watch my Youtube Tutorial here

\
You could do so many different shapes and patterns if you wanted to. I stuck to a simple pattern with just outlining the edges, but I like the simplicity of it and how it just adds a pop of color to the shoes.


Not every dot is perfect but these are one of a kind so you can't go wrong!

Let me know if you try this and hashtag your pics with #aimtocreate!

Monday, September 9, 2013

DIY- Gluten Free Facial Cleanser & Body Scrub

So it's no secret that have been focusing my beauty regimen to be more natural and organic. Well I have also been focusing my eating habits to try and be more Gluten free if possible. While looking up recipes on Pinterest I came across this recipe for a Gluten free Facial Cleanser which can also pass as a body scrub. For those who are extremely gluten sensitive or have Celiac disease, Gluten can be absorbed through the skin, so this is definitely something for you! 

As many know Coconut oil has been all the rage lately with uses ranging from cooking to hair, skin, etc etc. Grapeseed Oil is also another handy thing to have around the house for multiple purposes. First off it's the less expensive of the various oils that are multi-purpose. It's a light oil so it absorbs quickly, and it's odorless. Just like Coconut oil, you can use this in your hair (great for dry scalp) and your skin. It helps regulate oil which is perfect for oily skin and it's filled with Vitamin C which is a big plus. 

Here are the ingredients you will need for this cleanser/scrub:

  • 1 Cup Organic Virgin Coconut Oil
  • 1/4 Cup of Cold pressed Grapeseed Oil (I am using a Grapeseed oil that I picked up in the beauty section of my health food store, however you can use the oil from the cooking section as well)
  • 1 Cup of Raw Sugar


You will need also:

  • Measuring cup
  • Bowl
  • Spoon 
  • Container with lid (I'm using a glass mason jar with a plastic lid)


Watch my Youtube Tutorial here


Here is what it looks like all mixed and ready to go

I also have been trying out for the past few months oil cleanses for my skin and using Avocado Oil as a moisturizer, both which have really worked wonders. I came across these methods from a fellow Youtuber named Kassie and her channel CloudyApples
Check out my Top Favorite Skin Care Products here where I talk more about this


Monday, September 2, 2013

DIY- Turn a Necklace into Headband

Back for my second week of "Do it Myself Mondays"...
I just love this idea and how you can switch one item back and forth for two different uses! 
I had looked through my jewelry collection for a necklace that would work for this project but couldn't find any. So off to the store I went in search of a good bargain. I came across this simple yet unique necklace at Kohls. I like how there is movement to the necklace instead of it just being flat. Just make sure that it is the right size for your head and you are good to go!


I found it on the clearance rack. 
Regularly $24 marked down to $4.80!

When looking for a necklace, one with this type of closure is best

Now all you need is a hair band and some pliers

Watch my Youtube tutorial on how to do it


This is how it's attached

Finished product


If you have tried this or are going to make sure and comment! 
Also check out my Youtube Channel for more DIY's